Skip to content

mid-century

under bed storage

Bed Frame Inspiration

Not too long ago we upgraded from my old queen size bed to a king size. It was a big change, but necessary because my mattress was old and there was a big sale so we got a really good deal. We opted to get the box spring that comes with the mattress because my old IKEA frame would be too small and it was falling apart. We then decided to just get one of those cheap metal frames that come with the mattresses because we didn’t know what else to do at the time and we had zero budget. I immediately missed the under bed storage we had from our previous bed frame, so we made some wood boxes and attached low profile caster wheels to roll under our bed. It’s not aesthetically beautiful, but it’s super functional.

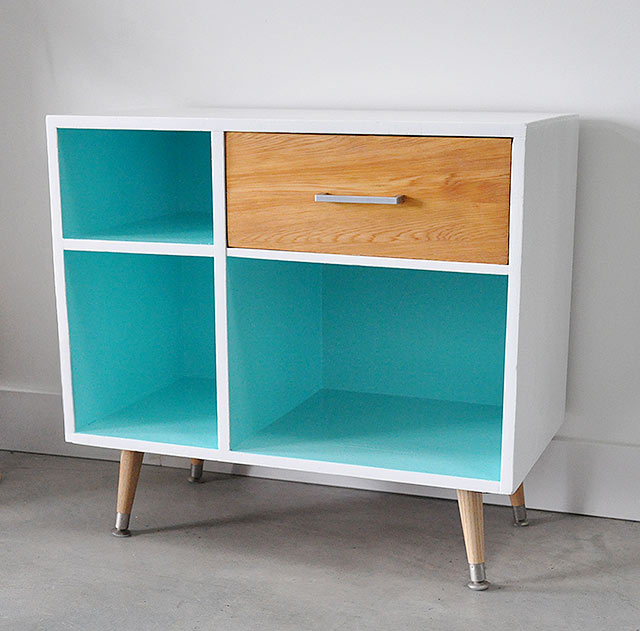
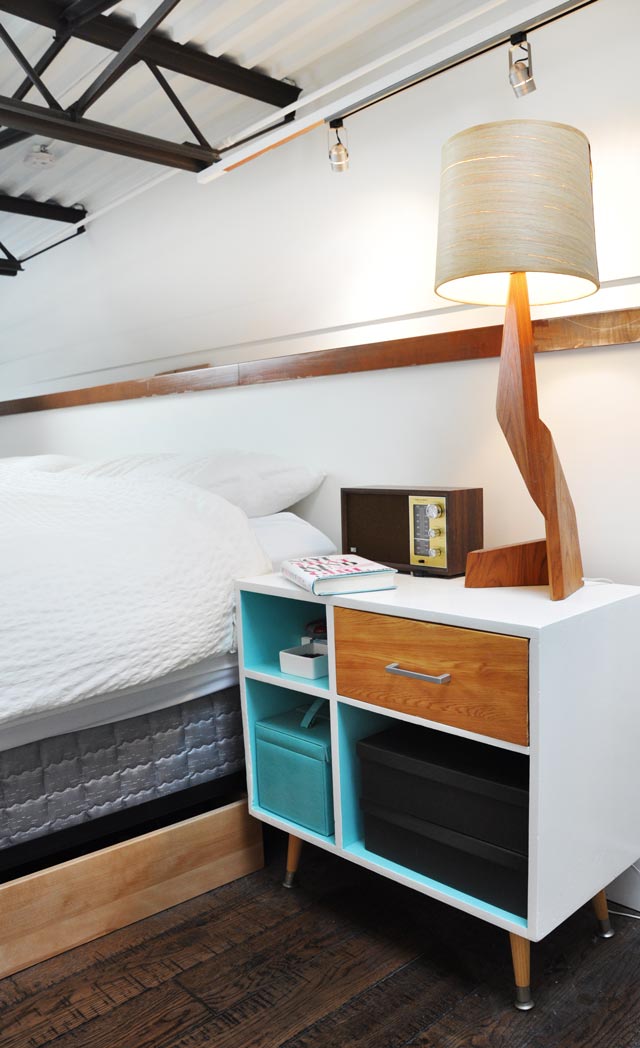
I’m actually kind of embarrassed to show this photo with the ugly box spring showing, but it’s reality. Maybe just focus on the pretty night stand and lamp instead, haha.

under bed storage
We still don’t have the budget to change things, so we’ll likely just put a cover on the box spring and have it that way for a few more years, but that doesn’t mean I can’t dream, right?

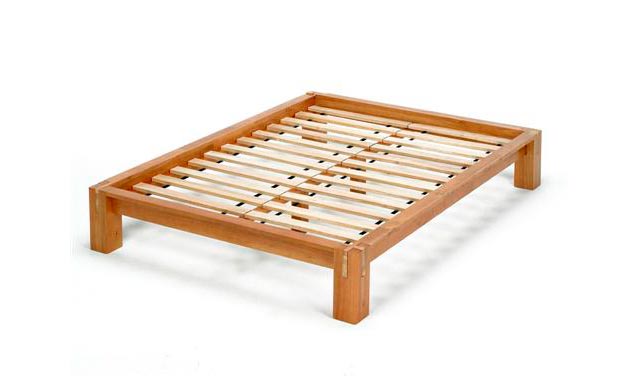
I’m a big fan of a Japanese style bed that has interlocking joints so there’s very little need for screw or nails. These beds are commonly known as tatami mat beds, because there’s usually an option to sleep right on a tatami mat rather than a mattress. The first example below shows what I’m talking about, note the wood joins at each leg post.

japanese tatami mat bed frame
(source)
Read More »Bed Frame Inspiration

vintage furniture before and after

Before and After: Vintage Dresser

After a few weeks of procrastination during the holidays, we finally finished this vintage dresser project. It’s come a long way since we first got it. It was cleaned, patched and brought back to life.

Here’s what it looked like before we started working on it, yes at first glance it doesn’t look too bad, but it was scary. It had 1000 spiders in it from being left outside, so that took a while to get it clean and remove the musty smells.

vintage dresser before
The wood veneer was very dry and chipped in several places, the only area that was in decent shape was the top surface, the legs and the decorative pieces on the drawer fronts.

Luckily we were table to remove the decorative pieces on the drawers, making the painting process much easier and cleaner. The bow tie handles were also removed and cleaned up.
vintage dresser before and after
The first test was to find out if the vintage hardware was pure brass or just plated. You can do this with a magnet. If it’s solid brass, the magnet will not stick, unfortunately ours was plated.
Read More »Before and After: Vintage Dresser

vintage night stand

Before and After: Vintage Night Stand

A while back I refinished a junky white box into a modern mid century style night stand. I ended up keeping it for myself. Ever since then, Andrew has been looking for a vintage night stand to match mine. You could say he had night stand envy.

Here’s the piece we were matching it with, you can read more about this before and after over here

vintage mid century modern cabinet

So we were on the lookout for something that had similar bones. We recently found this little guy:

vintage night stand before and after

This piece was frumpy, especially with that hardware, super short legs and cream paint. We wanted to give it a modern facelift. Right away we ripped off the drawer front, because we knew it was plywood and we wanted a nice wood front to match the other project I did. We went to the hardware store and got them to cut a piece of 1/4 inch maple veneer to size. If you ask your local hardware store very nicely, they won’t charge you for cuts. Well at least that’s what the awesome guys at Windsor Plywood did for us! I think it was because I smiled ever so nicely at the guy. It only cost about $13 for the drawer front and we have so much leftover wood for another project, but I’ve already decided I’m going to keep the thin sheet of veneer to use as a photo backdrop for now.

We brought it home and glued and clamped it to the drawer face. We just used regular wood glue and heavy duty clamps. It sat clamped for about a day. Once it was dry we applied several coats of danish oil and drilled holes for a modern drawer pull.

wood veneer drawers

You’ll also notice we switched out the legs to give it more height so it would work better as a night stand and so it matched the other piece I did. You can find legs like this at Home Depot, but we got ours at a garage sale for pretty much nothing.

The entire piece was primed using CIL Smart3 Primer and the final coat was Benjamin Moore Advance in Tropicana Cabana and Snowfall White.

Here’s the final result of our modern vintage night stand:
Read More »Before and After: Vintage Night Stand