So it’s August 2nd and it’s shocking to think that this time last year we got the keys to our place and began our renovations. We’re so happy with the apartment that i’ve totally forgotten to keep my blog updated with renovation photos. That and every time I think to take “after” photos, it’s too dark. The stuff I’m about to share with you is even a bit out dated, since then we’ve put up art on the walls and de-cluttered a ton.
Anyway, this may be a year late, but hey…better late than never I suppose.
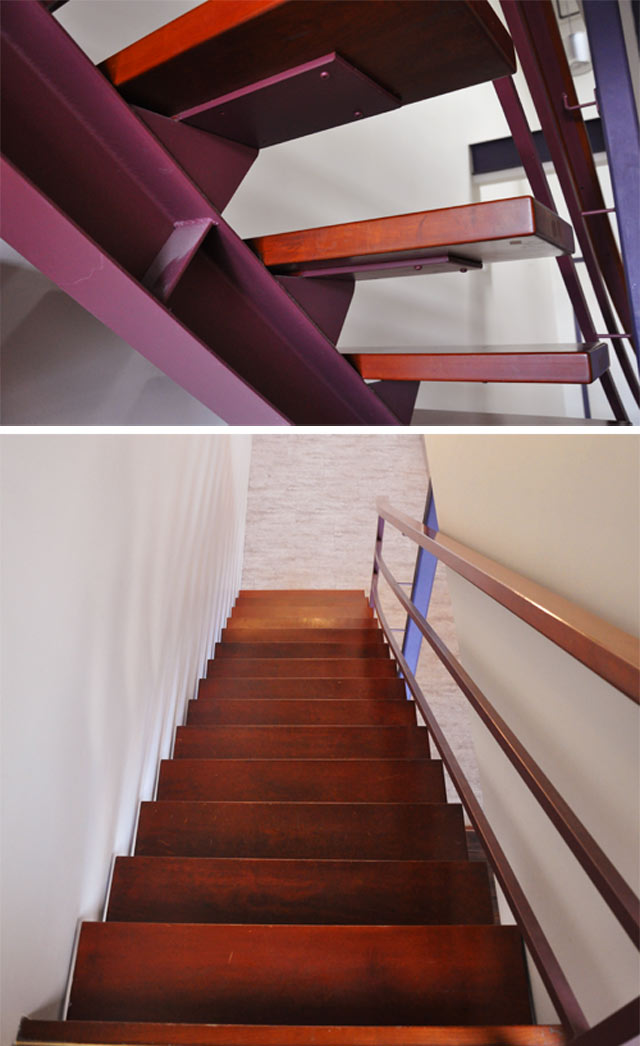
The loft stairs are solid wood and have so much potential that was hidden under a nasty red varnish. Why on earth they decided to hide the natural wood behind the ugly stain really boggles my mind, but there’s a lot about this place that made me wonder what the previous owners were thinking.
Check out the ugly red stain, which of course it much “redder” in person. Oh and don’t even get me started on the purple and burgundy paint. (which was later covered up with dark brown and white)
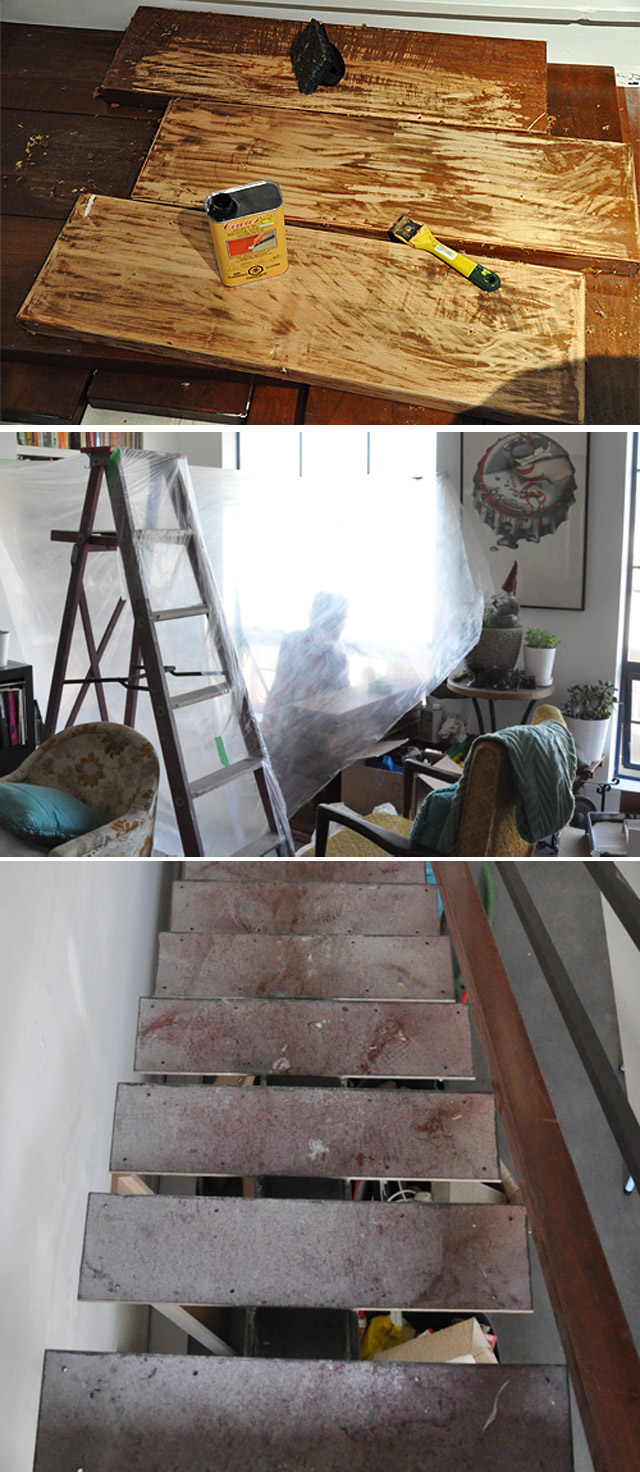
We removed all the stairs at the start of the renovation, we didn’t want to damage the wood during construction. It worked out fine, since there’s metal bars under them to step on. We numbered each stair and stored them in the closet until we were ready to refinish them.
When it came time to start, we bought a heavy paint and varnish remover that comes in a gel format. It’s extremely toxic and burns like crazy if you get it on your skin, but it works so well. You need a scraper, paper towel and a heavy duty drop cloth. Using this stripper was pretty much the only option, because we wanted to limit the amount of saw dust we created (at this point we had already moved in). Andrew has tough hands, so he took on the stairs project and scraped off as much varnish as possible.
Once that phase was done, we built a plastic tent over the window so Andrew could use an electric sander and avoid getting saw dust EVERYWHERE. We thought it was a genius idea, we strategically taped off a corner in the apartment including the window for ventilation. Andrew even used a sander that had a built in bag to collect the dust. But guess what? The sawdust was so freggin’ fine that it managed to escape the tent! For days after, actually more like weeks, it rained down sawdust on everything. No matter how much I wiped things, it was still there the next day! I guess it prevented it from being much much worse, but it wasn’t perfect and we really had no other option.
Check out the process photos below.
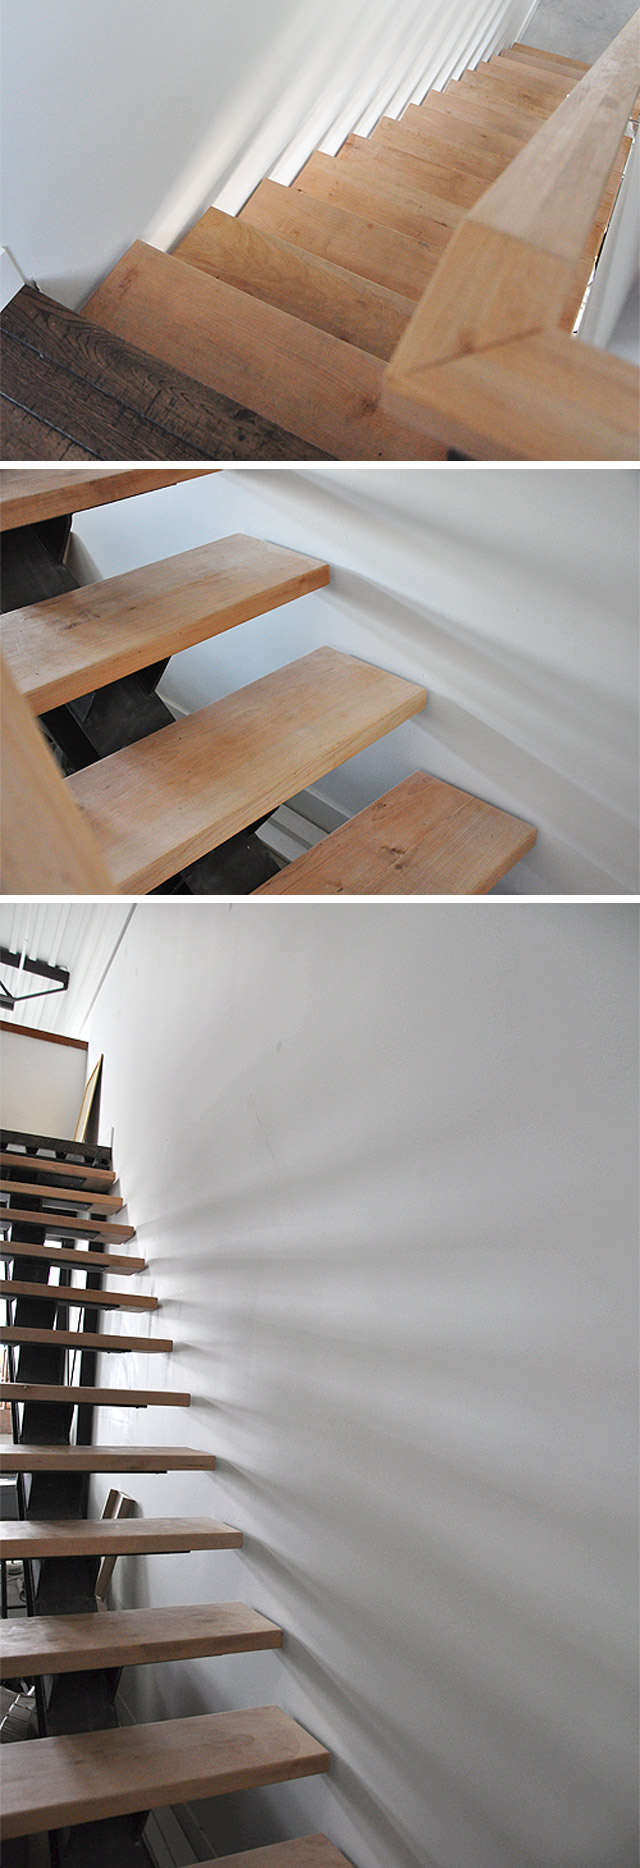
After all the sanding was done and the nice light natural wood was revealed, we couldn’t wait to bolt them back onto the stair frame. Except there was one major problem, the numbers we wrote on the steps came off and we had lost track of what went where! So much for being really organized! So it began, our game of trial and error, lining up the existing screw holes because they were all screwed in differently by the previous owners. We were just glad there weren’t that many stairs. (Although i’m pretty sure Andrew wasn’t thinking that while he was sanding the never ending pile of wood).
After some swearing and dropping many screws, the loft stairs were on and they were beautiful. There’s nothing like natural wood sealed with a clear bees wax. The hallway feels so much brighter now.

Pingback: Wood Railing Nightmare | visualheart