A while back I refinished a junky white box into a modern mid century style night stand. I ended up keeping it for myself. Ever since then, Andrew has been looking for a vintage night stand to match mine. You could say he had night stand envy.
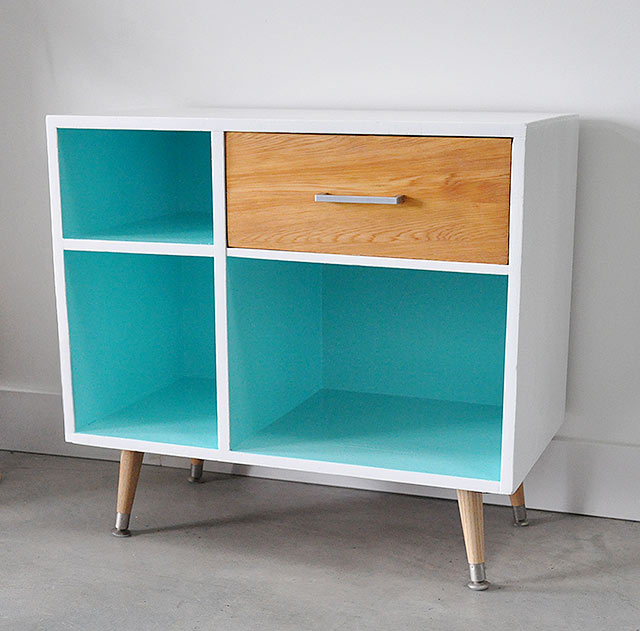
Here’s the piece we were matching it with, you can read more about this before and after over here
So we were on the lookout for something that had similar bones. We recently found this little guy:
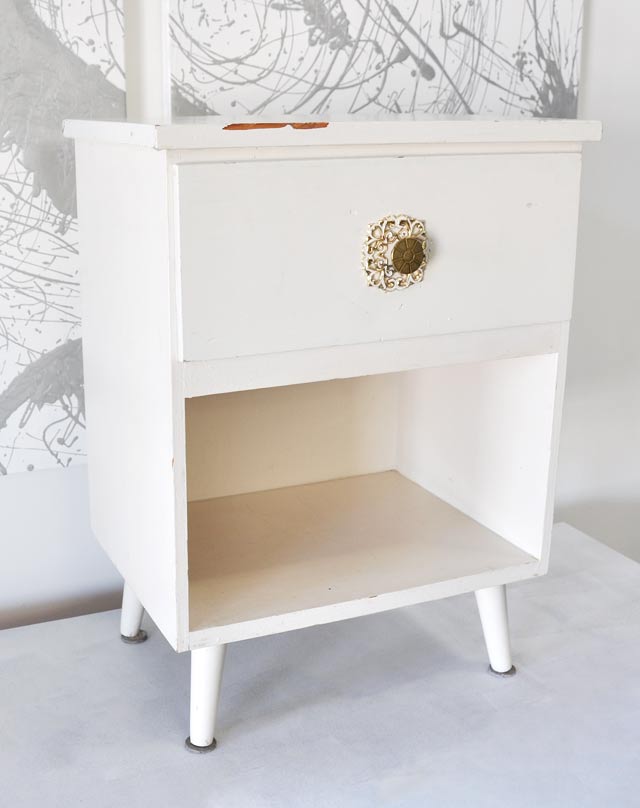
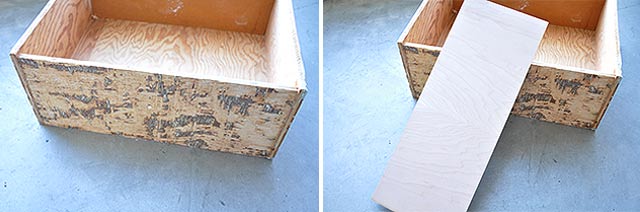
This piece was frumpy, especially with that hardware, super short legs and cream paint. We wanted to give it a modern facelift. Right away we ripped off the drawer front, because we knew it was plywood and we wanted a nice wood front to match the other project I did. We went to the hardware store and got them to cut a piece of 1/4 inch maple veneer to size. If you ask your local hardware store very nicely, they won’t charge you for cuts. Well at least that’s what the awesome guys at Windsor Plywood did for us! I think it was because I smiled ever so nicely at the guy. It only cost about $13 for the drawer front and we have so much leftover wood for another project, but I’ve already decided I’m going to keep the thin sheet of veneer to use as a photo backdrop for now.
We brought it home and glued and clamped it to the drawer face. We just used regular wood glue and heavy duty clamps. It sat clamped for about a day. Once it was dry we applied several coats of danish oil and drilled holes for a modern drawer pull.
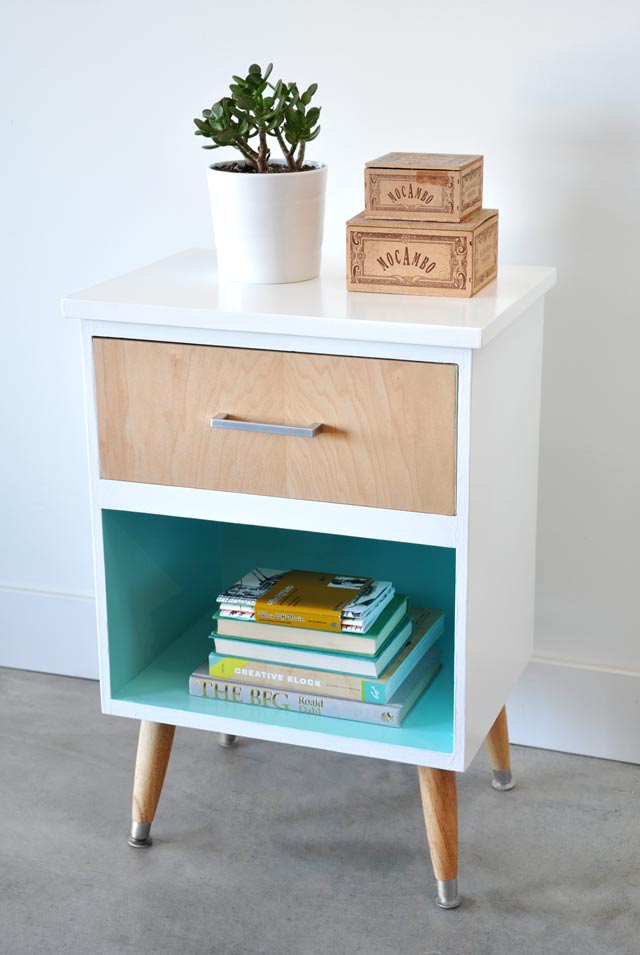
You’ll also notice we switched out the legs to give it more height so it would work better as a night stand and so it matched the other piece I did. You can find legs like this at Home Depot, but we got ours at a garage sale for pretty much nothing.
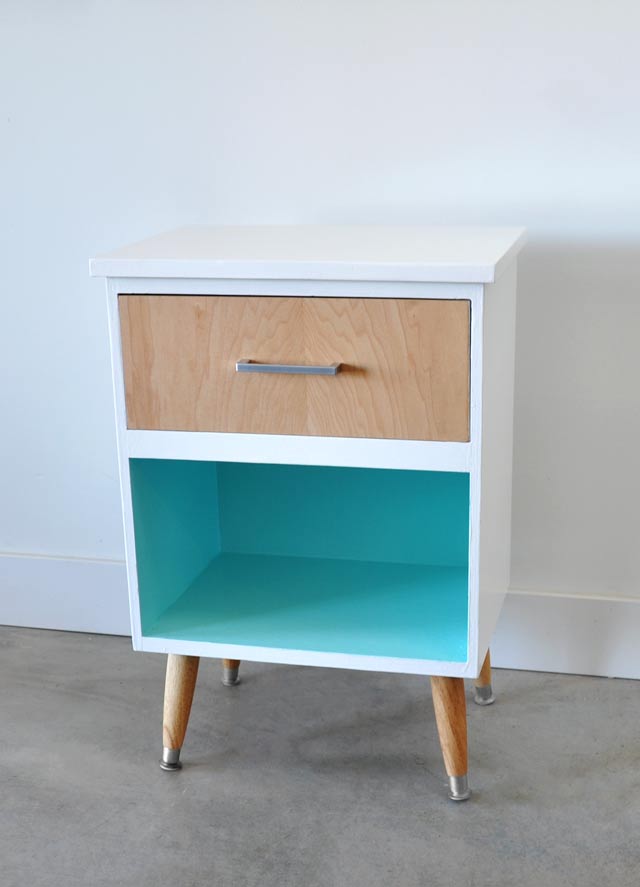
The entire piece was primed using CIL Smart3 Primer and the final coat was Benjamin Moore Advance in Tropicana Cabana and Snowfall White.
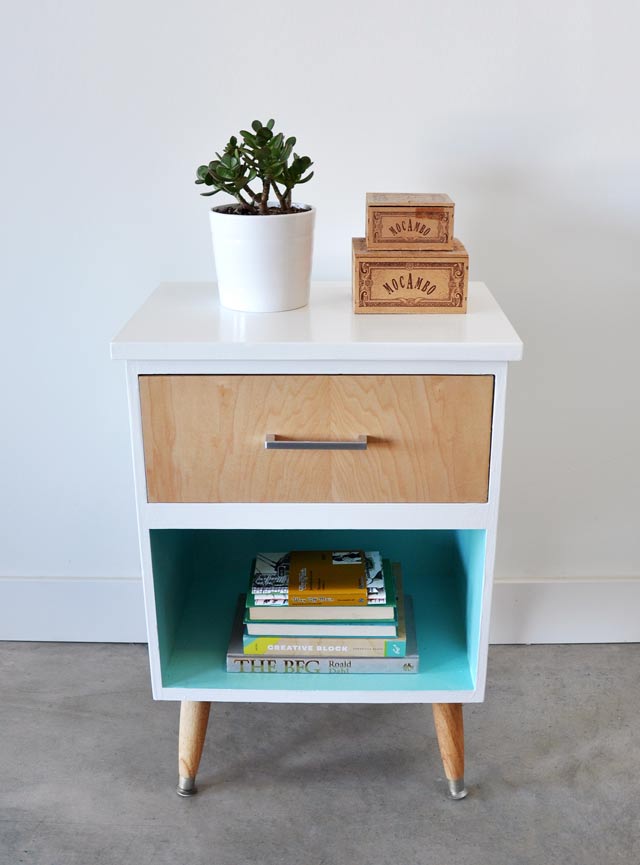
Here’s the final result of our modern vintage night stand:


Well, you’ve done it again! Terrific job! I just LOVE seeing these before and afters!
Thanks so much Mariella!
Such a good job! Wonderful! Love it, as well as your previous one.
I discover now your blog and it’s really a pleasure to see all your job.
I’ve got an old little dresser. I don’t know what i can do for its interior. Outside it looks good as i like, but inside the drawers there is some sinter (i don’t know if it’s the good word, i’m a french lector it’s a little bit difficult to explain technical things in english….), and i wonder if i can put it off…. maybe sanding them… it will be a big job…..
Well, thanks for your ideas, everything is so wonderful here!
This is so perfect! I love the color pop. Also, thanks for sharing that home depot has tapered legs, I didn’t know! Pinned this!
Thanks so much Karisa 🙂
I left a comment on AT too but wonderful job! We’re in Vancouver as well and found the doppelgänger of your little unit on Craigslist a few weeks back for $20. I was a bit let down it was only made of plywood (and that the person I bought it from only paid $5 for it according to the price scrawled on the bottom) but I loved the shape of it. I’ll be taking inspiration from your project and doing something similar. Thanks!
Oh nice, I wish you lots of luck fixing it up! Thanks for the kind words!
Fabulous ! Have been looking for a tutorial for bedside tables – can’t find what we want so I was delighted to find this! Will have to tour the boot sales and 2nd hand shops ! You have done a beautiful job – so inspiring ! Thanks a million !
So glad you’re feeling inspired. Good luck finding furniture 🙂
Hi! I love this! Beautiful! On this type of drawer, does it have rails? Or does it just rest on a board/shelf to hold it up? thank you!
nicole
Hi there, thanks for checking it out. No rails, it just rests on the shelf.
Looks awesome. I love the blue color pop. My friend now wants me to make her one like that. Could you send me the (approximate) dimensions for it? (width, depth, height of the cabinet part, total height)? (* smiles ever so nicely *)