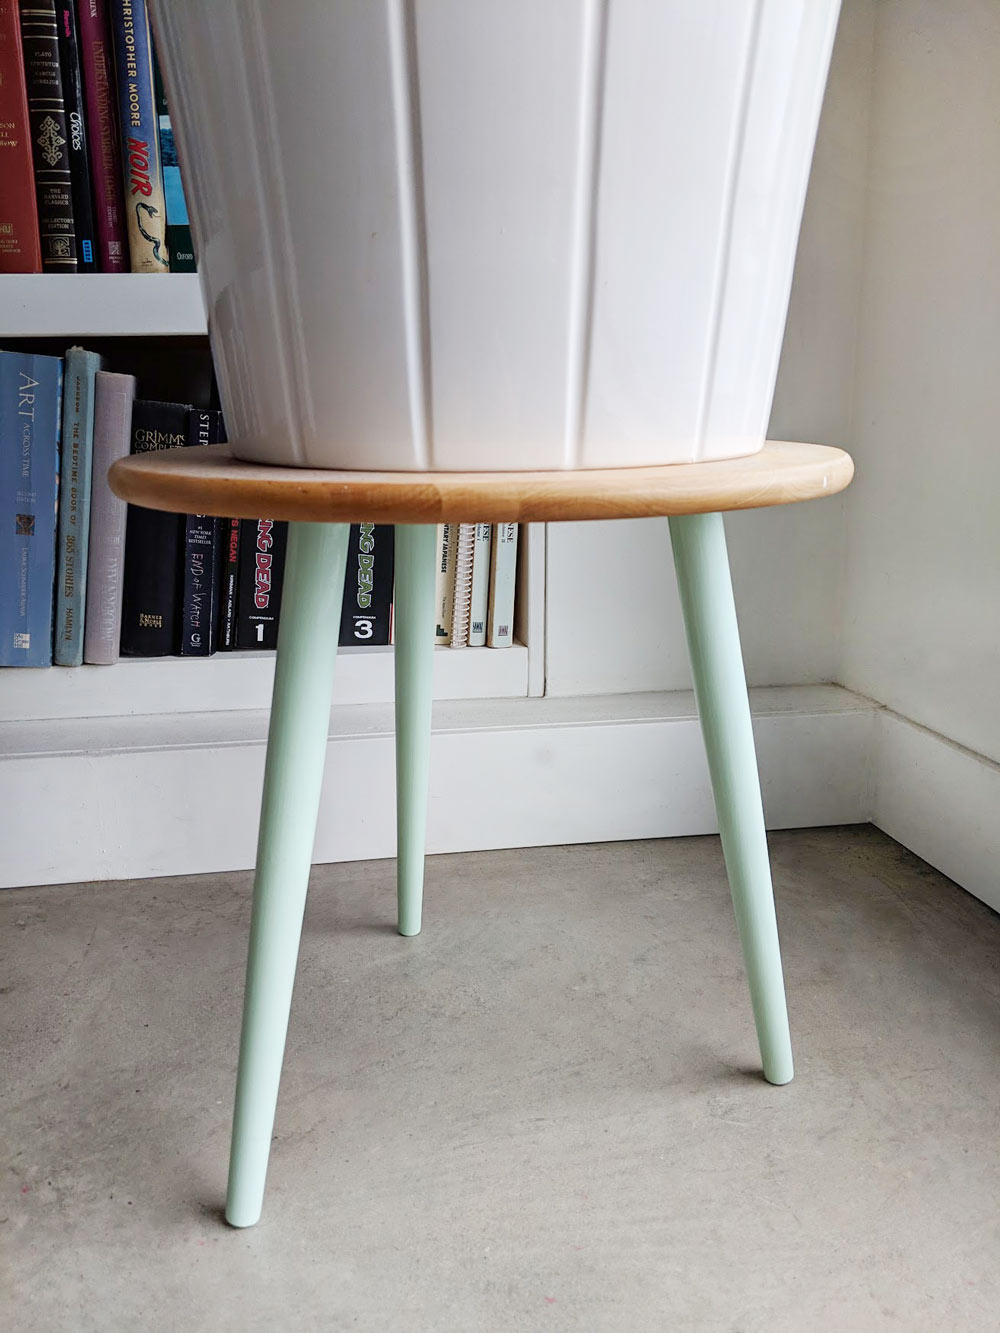
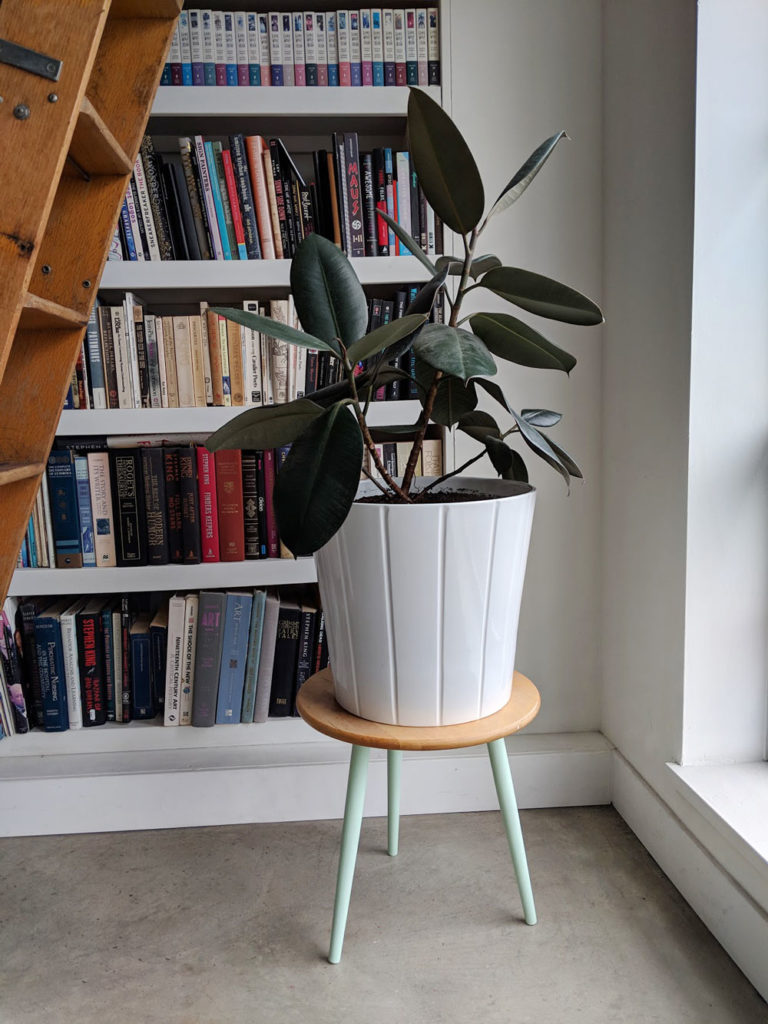
This project is for those that don’t want to pay high prices for a vintage style plant stand. I created this project by accident with some pieces we had around our apartment. It all started with an odd number of furniture legs that couldn’t be used on a dresser and an old IKEA lazy susan we never used. So here’s what you’ll need to make your plant stand.
Supplies:
3 vintage style furniture legs (my furniture legs are actually vintage)
3 furniture leg plates – make sure to get the ones that angle
Screws – 3 per leg plate
IKEA lazy susan or round wood cutting board
Paint (optional)
How to:
Take your IKEA Snudda lazy susan and only use the large top piece, discard the small base and other parts. (Tip: you can source a round cutting board from the thrift store or get wood cut at the hardware store if needed.)
Take your leg brackets and place them on the back of the IKEA S
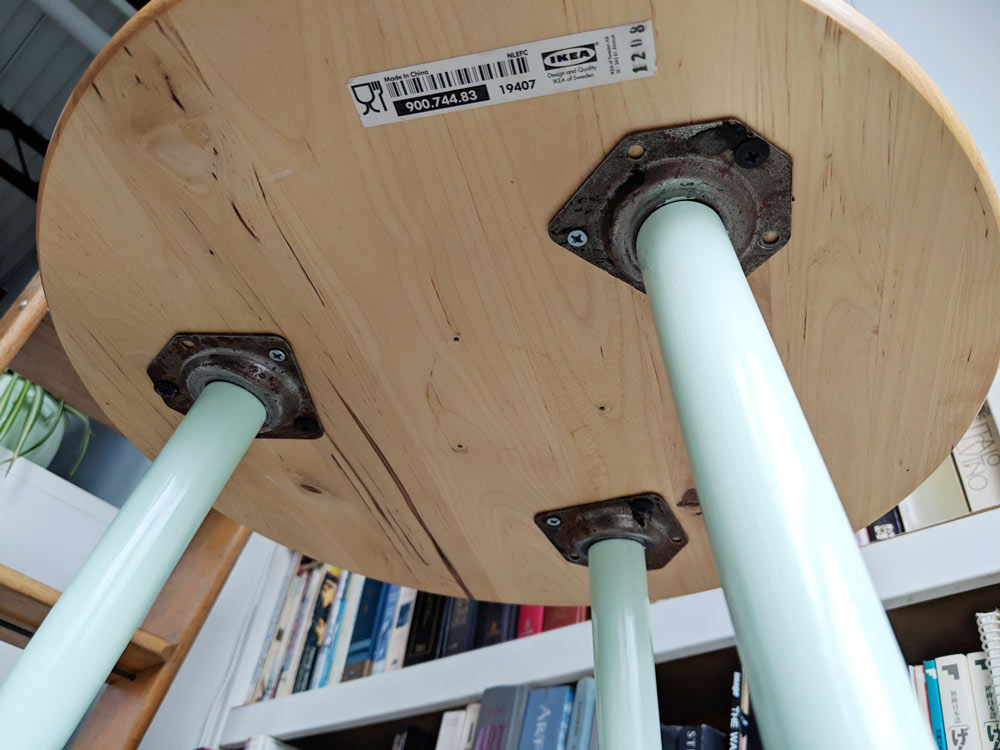
Using short screws (so they don’t go through the entire board) attach your brackets to the IKEA Snudda board.

At this
Once you’ve finished your legs, screw them into the brackets on the back of your IKEA Snudda, flip it over and you’re ready to place a plant on top!
Have fun choosing your leg length, go super short or 12″ tall, but I wouldn’t go taller, there’s a great chance of it being wobbly.

Love this idea!!! Let the thrift store hunt for round cutting boards begin.
Thanks Gemma! And if you look carefully you can even find those vintage legs. I scored a lot of them a few years back, the thrift store I was looking at had a box full for pennies a piece. But they’re also pretty affordable at the hardware store.