Skip to content

upcycle

Before and After: Grey and Gold Painted Vintage Dresser

I know it’s been a while since I’ve posted a painted dresser makeover, but the honest truth is that I haven’t had any projects! I’d be looking for one to work on every week with no luck, sure there were lots of very expensive dressers, solid teak cabinets etc, but my focus is to bring new life to vintage plywood dressers that I don’t feel guilty painting. Plus it just feels great to make something ugly beautiful again.

Here’s what I recently got my hands on, it’s a simple 6 drawer plywood and particle board dresser, nothing fancy really, but better than nothing! My neighbour was getting rid of it and all I had to do was wheel it into my apartment and it was mine.red painted dresser before and after
I had to save this dresser! I couldn’t let this badly worn red paint live this way in someones home. It needed a makeover, even if it wasn’t perfect, just something simple to freshen it up. A few coats of white paint and some new hardware would do the trick. The drawers were in really rough shape and so was the top surface, I did what I could to fix it, but even after patching it and sanding, it’s still pretty rough, but the fresh coats of paint really helps.Read More »Before and After: Grey and Gold Painted Vintage Dresser

painted vintage mid century modern sideboard before and after

Before and After: Painted Vintage Sideboard

This past Summer Andrew and I found this awesome solid plywood vintage sideboard, credenza, mid century modern cabinet (whatever you want to call it). I finally took some photos of it to share here and can’t wait to finally sell it….or keep it…

It weights a ton and if you could have seen how we got it home you would of had a good laugh, lets just say thank goodness we didn’t live too far from where we found it!

Here’s the before photos of this vintage sideboard:

vintage sideboard before and after

Here’s some close ups of all the ugly laminate that was broken and peeling off. Those legs though…
You have no idea how good it felt to remove all the loose bits of laminate!

vintage credenza before and after

Read More »Before and After: Painted Vintage Sideboard

vintage furniture before and after

Before and After: Vintage Dresser

After a few weeks of procrastination during the holidays, we finally finished this vintage dresser project. It’s come a long way since we first got it. It was cleaned, patched and brought back to life.

Here’s what it looked like before we started working on it, yes at first glance it doesn’t look too bad, but it was scary. It had 1000 spiders in it from being left outside, so that took a while to get it clean and remove the musty smells.

vintage dresser before
The wood veneer was very dry and chipped in several places, the only area that was in decent shape was the top surface, the legs and the decorative pieces on the drawer fronts.

Luckily we were table to remove the decorative pieces on the drawers, making the painting process much easier and cleaner. The bow tie handles were also removed and cleaned up.
vintage dresser before and after
The first test was to find out if the vintage hardware was pure brass or just plated. You can do this with a magnet. If it’s solid brass, the magnet will not stick, unfortunately ours was plated.
Read More »Before and After: Vintage Dresser

Vintage Dresser before and after

Before and After: Vintage Dresser and Highboy

I was so eager to makeover this pair of dressers that I plain forgot to take a before photo of the highboy dresser. You’ll just have to visualize that it had the same finish as the matching dresser shown below.

vintage dresser before and after

Lets take a moment to talk about the dresser in its before state. It is so bland and lifeless. It’s a mix of 80s peach laminate with mid century legs and hardware. The brass plating was coming off the hardware and the “brass” on the legs was painted on, so that definitely had to go. The laminate was chipping and had some weird sun damage spots. I took a closer look at the drawers and discovered the laminate was placed over top of solid wood. Sadly this was only on the drawers, but it was a very exciting find!

The laminate was so thin, so it was fairly easy to sand off using an electric sander and a heavy grit sand paper. Once the drawers were sanded down, several coats of Danish Oil were applied until they were sealed and the finish was even.

The body of the dresser was sanded and patched because there were several dents and scratches. Once the surface was smooth, I applied a few coats of primer. The final top coat is Benjamin Moore Snowfall White in high gloss Advance.

Here’s the final result of the dresser and matching highboy:

Read More »Before and After: Vintage Dresser and Highboy

vintage night stand

Before and After: Vintage Night Stand

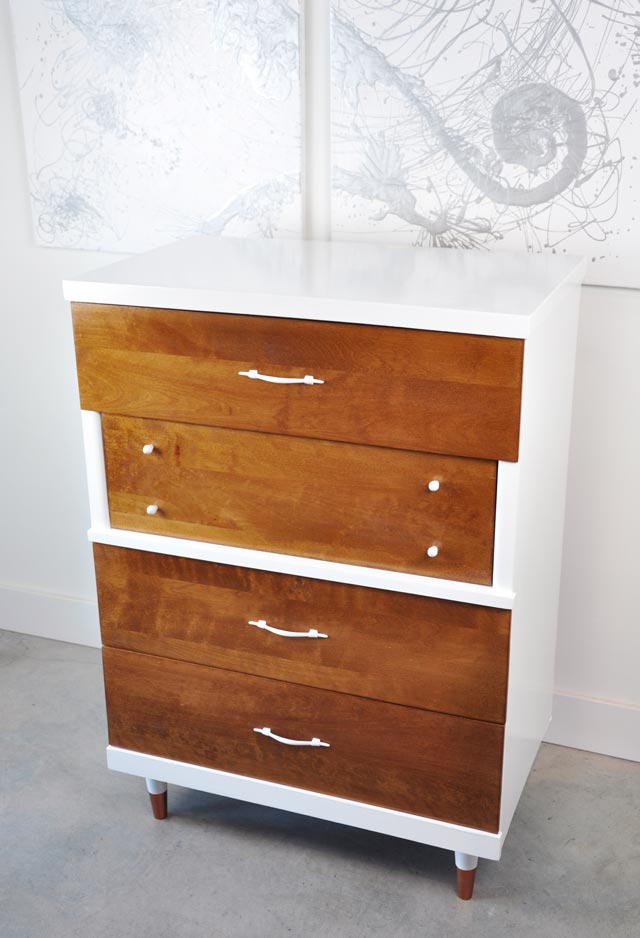
A while back I refinished a junky white box into a modern mid century style night stand. I ended up keeping it for myself. Ever since then, Andrew has been looking for a vintage night stand to match mine. You could say he had night stand envy.

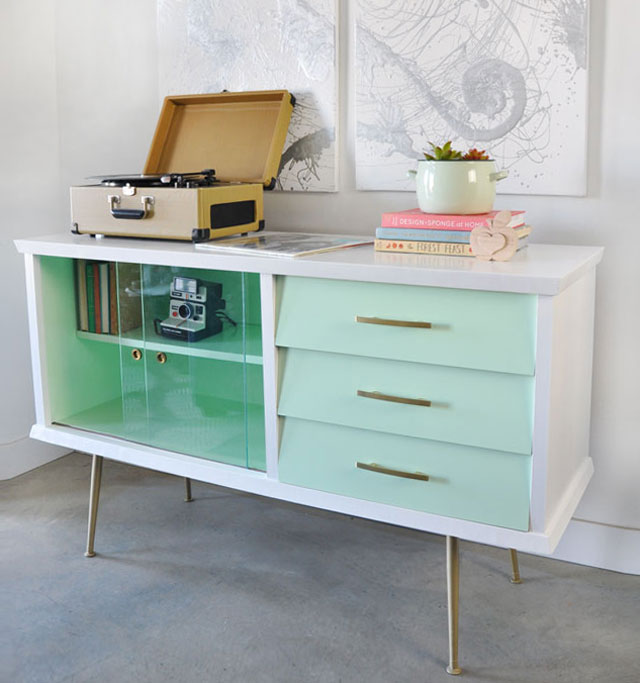
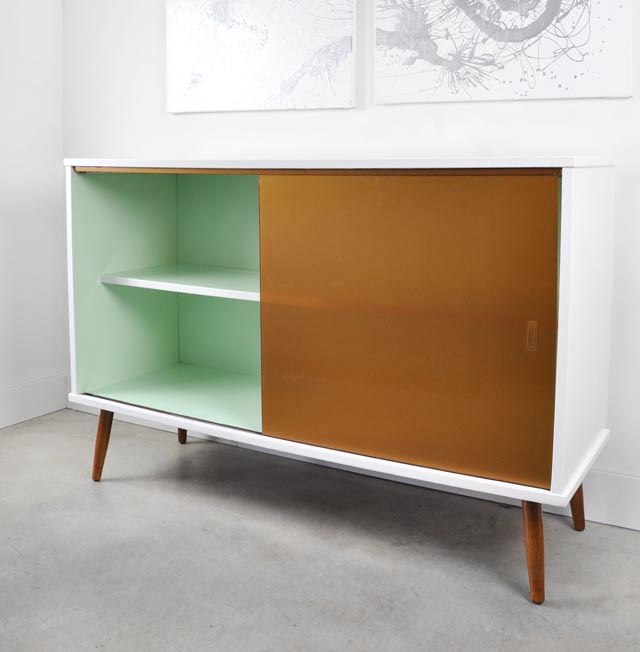
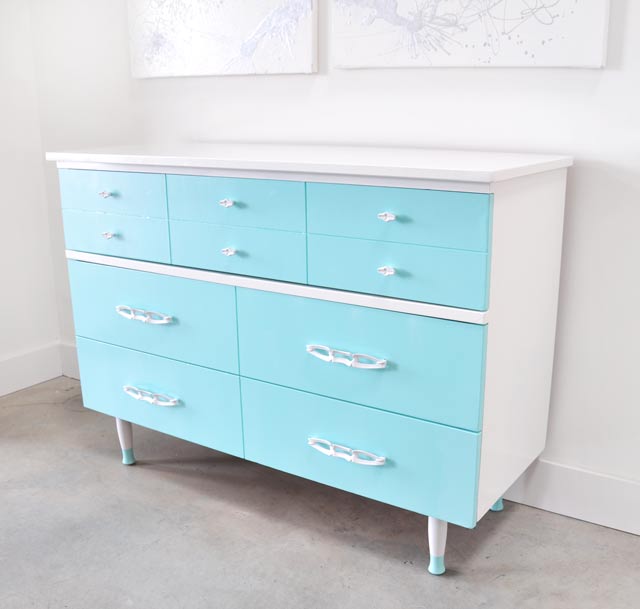
Here’s the piece we were matching it with, you can read more about this before and after over here

vintage mid century modern cabinet

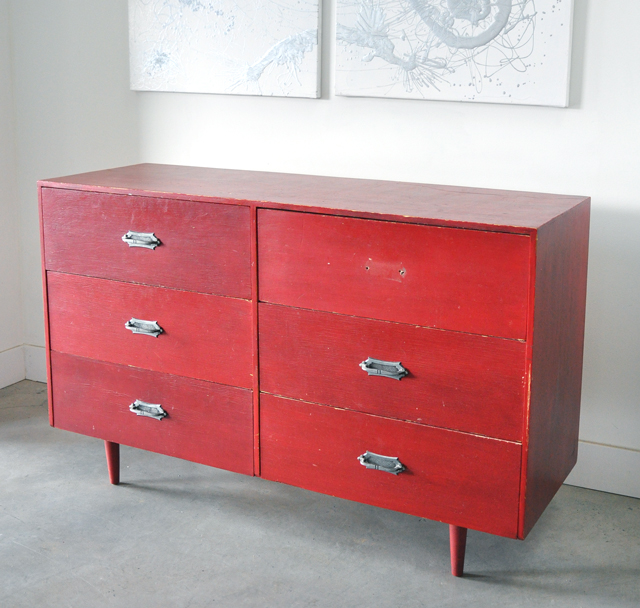
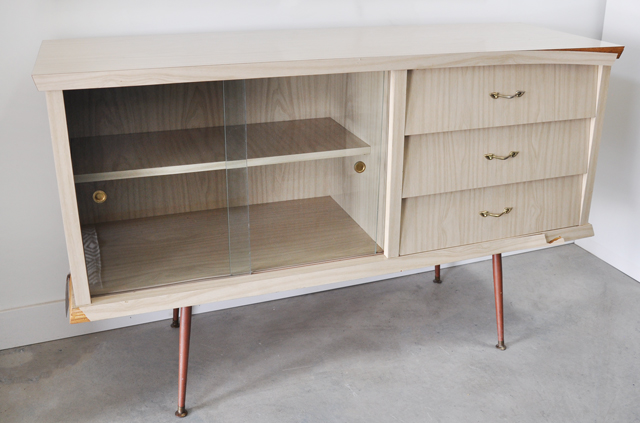
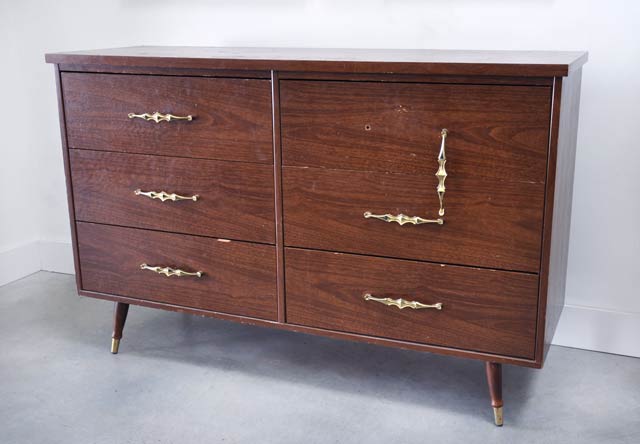
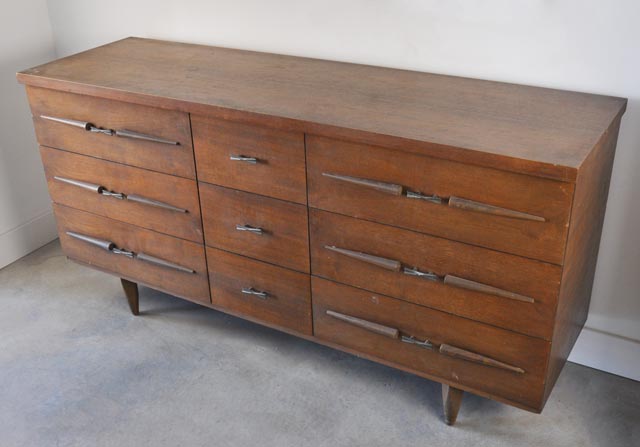
So we were on the lookout for something that had similar bones. We recently found this little guy:

vintage night stand before and after

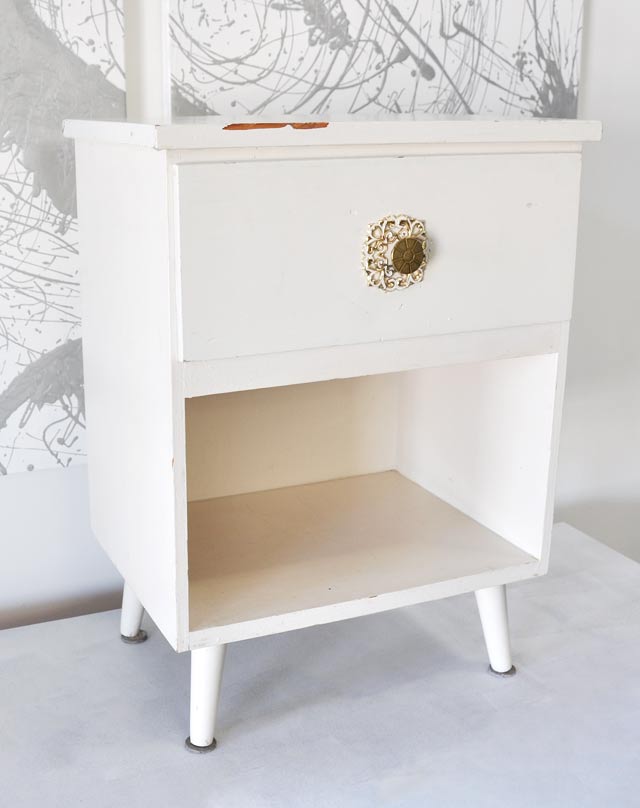
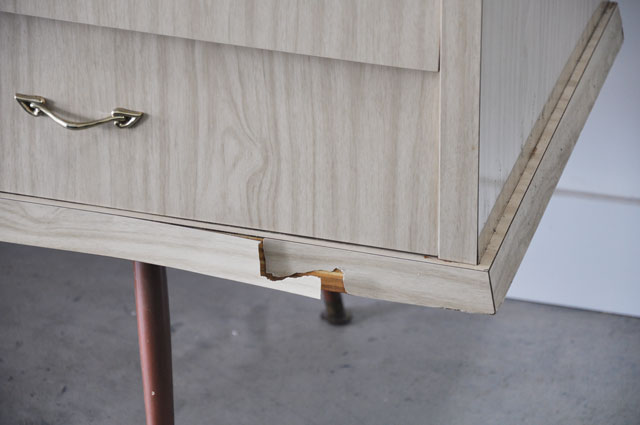
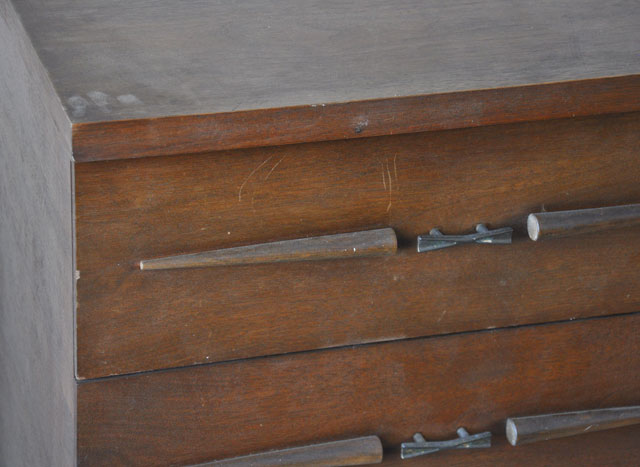
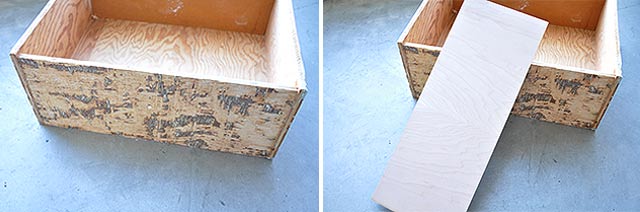
This piece was frumpy, especially with that hardware, super short legs and cream paint. We wanted to give it a modern facelift. Right away we ripped off the drawer front, because we knew it was plywood and we wanted a nice wood front to match the other project I did. We went to the hardware store and got them to cut a piece of 1/4 inch maple veneer to size. If you ask your local hardware store very nicely, they won’t charge you for cuts. Well at least that’s what the awesome guys at Windsor Plywood did for us! I think it was because I smiled ever so nicely at the guy. It only cost about $13 for the drawer front and we have so much leftover wood for another project, but I’ve already decided I’m going to keep the thin sheet of veneer to use as a photo backdrop for now.

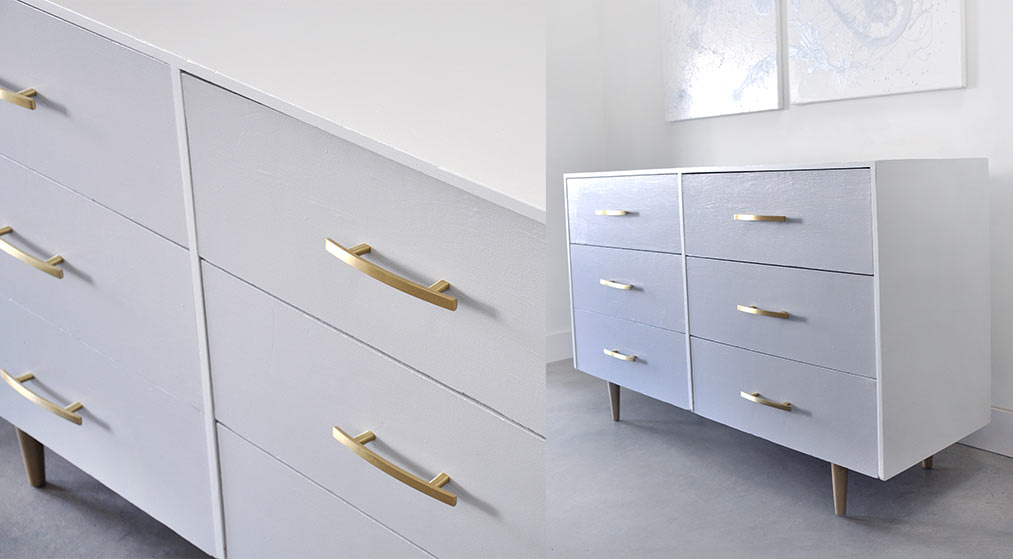
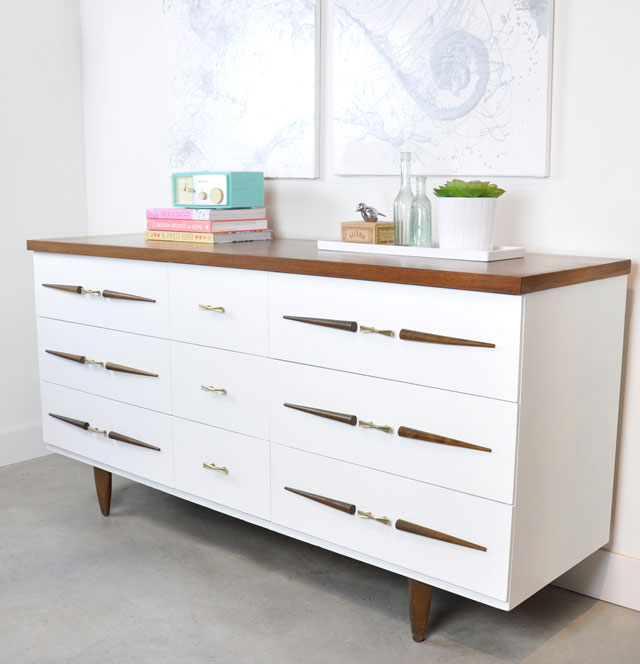
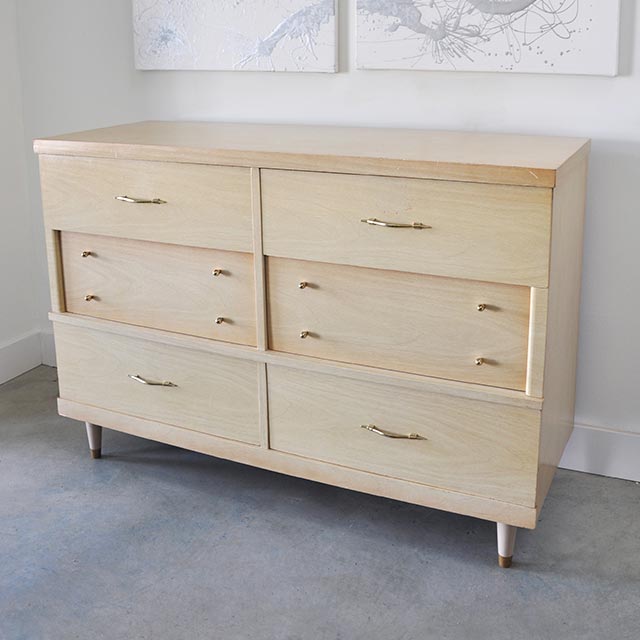
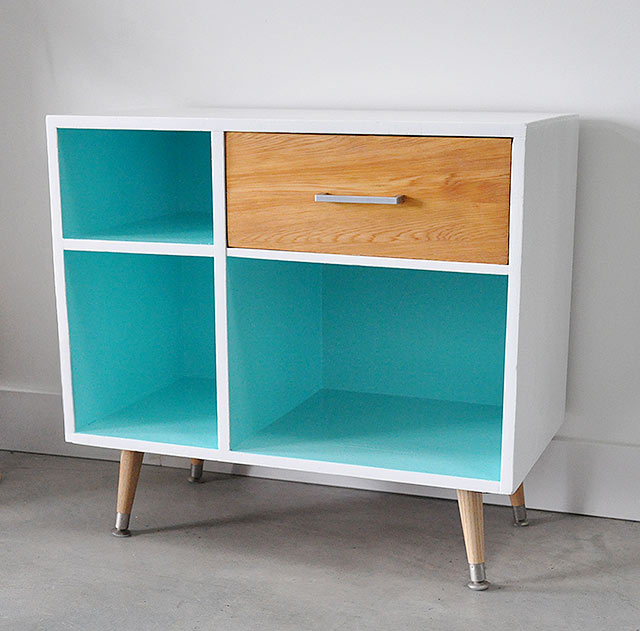
We brought it home and glued and clamped it to the drawer face. We just used regular wood glue and heavy duty clamps. It sat clamped for about a day. Once it was dry we applied several coats of danish oil and drilled holes for a modern drawer pull.

wood veneer drawers

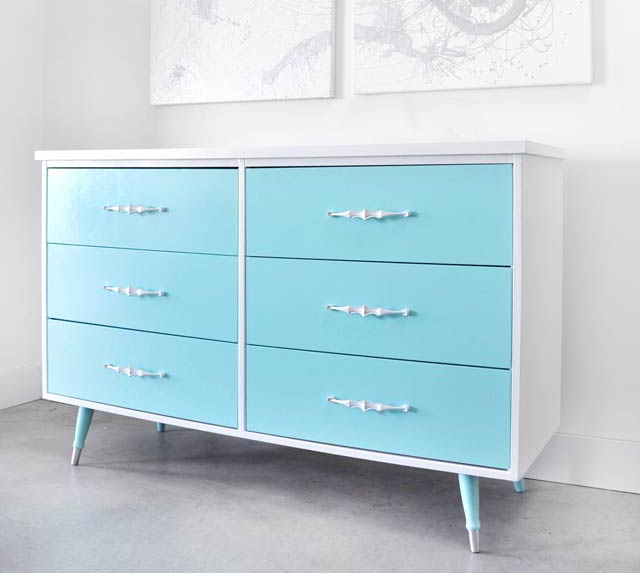
You’ll also notice we switched out the legs to give it more height so it would work better as a night stand and so it matched the other piece I did. You can find legs like this at Home Depot, but we got ours at a garage sale for pretty much nothing.

The entire piece was primed using CIL Smart3 Primer and the final coat was Benjamin Moore Advance in Tropicana Cabana and Snowfall White.

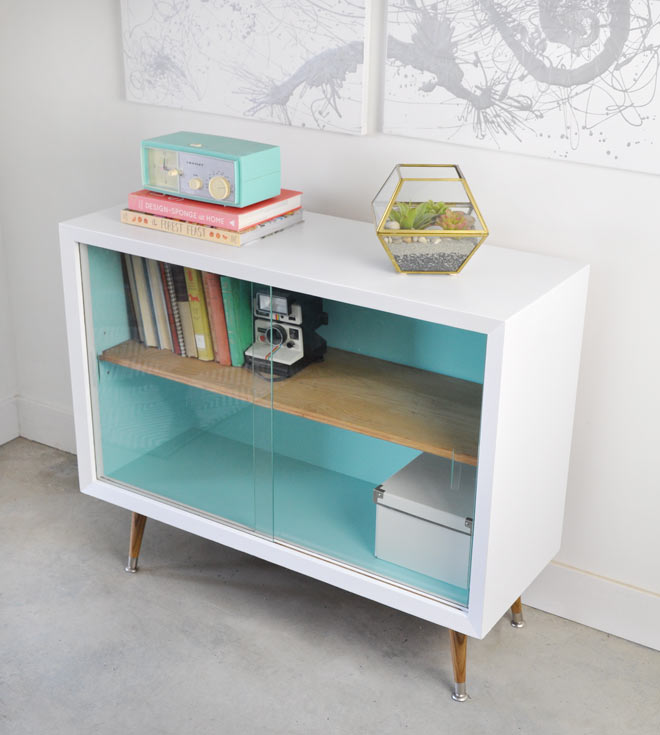
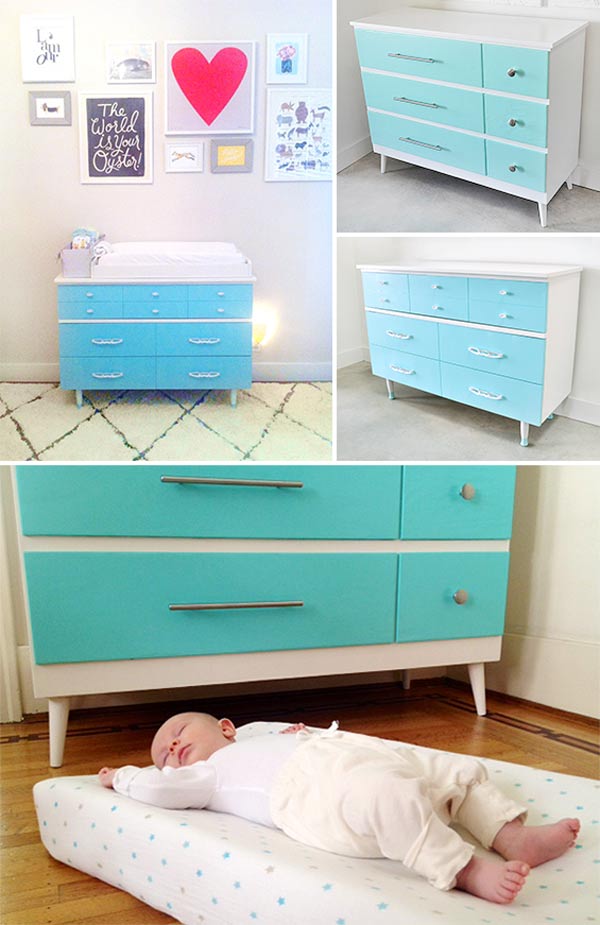
Here’s the final result of our modern vintage night stand:
Read More »Before and After: Vintage Night Stand