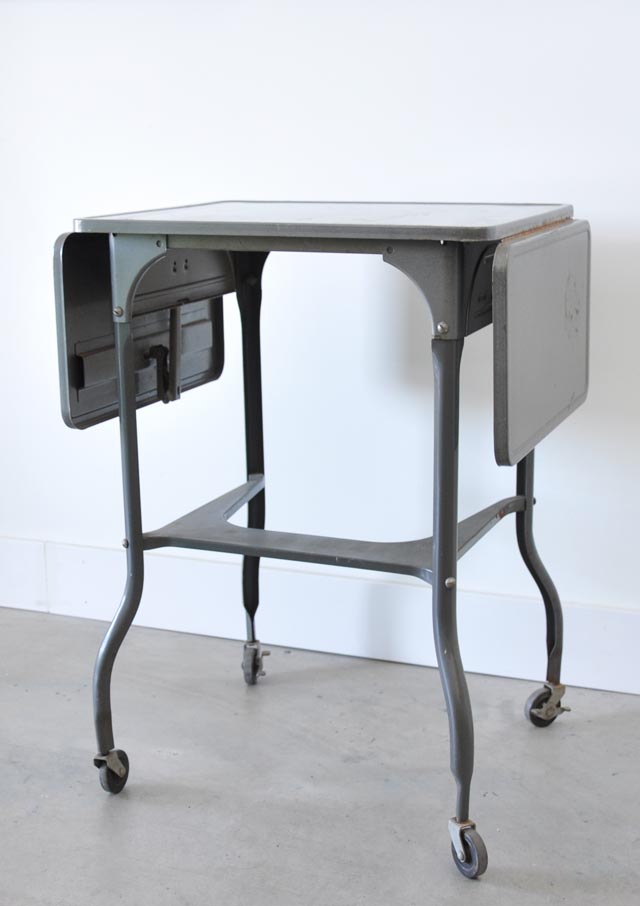
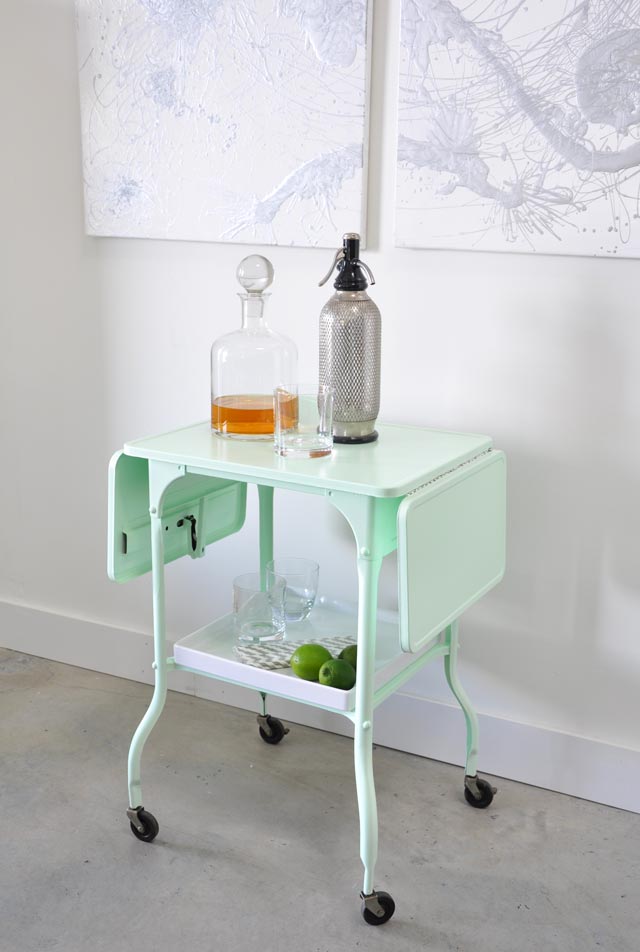
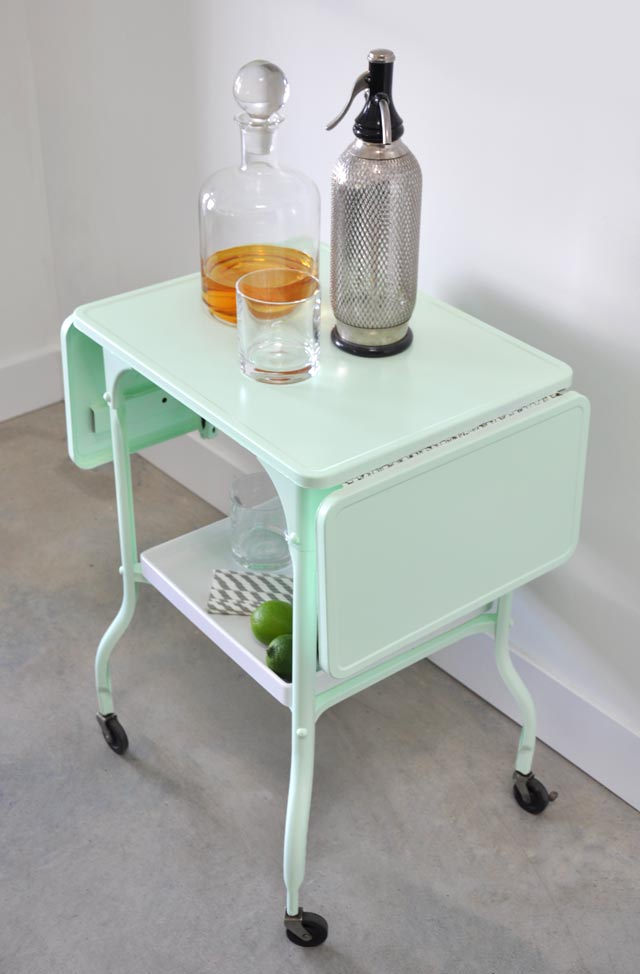
Andrew and I took a drive out of town to visit family and did our usual thrift store hunt for furniture. Just when we thought we found nothing, this awesome vintage typewriter cart was hiding amongst the junk for $5. I couldn’t believe the deal we got, I was super excited to paint it a fun colour.
I spent a long while debating between a spray painted finish or using a brush. Each had their pros and cons, but I kept being drawn back to hand painting due to my budget, we already had some awesome colours in a quality paint, foam rollers etc.. Spray paint is messy, expensive, requires many cans and needs to be done outside. While spray paint does give a smoother finish, the range of colours in a high quality durable finish is pretty boring. I specifically wanted a retro colour, pistachio, mint, light blue, something like that. After the ridiculousness we went through to paint our fridge, I wasn’t about to go through that again for this cart project.
In the end I went for a hand painted finish and I’ll tell you right now I don’t regret it, it just required a heck of a lot of patience and thin coats of paint alternating between the brush and foam roller.
Tools used:
WD40
Steel Wool
Paper Towel
Mini foam roller
Small paint brush
CIL Smart3 Primer
Benjamin Moore Advance High Gloss
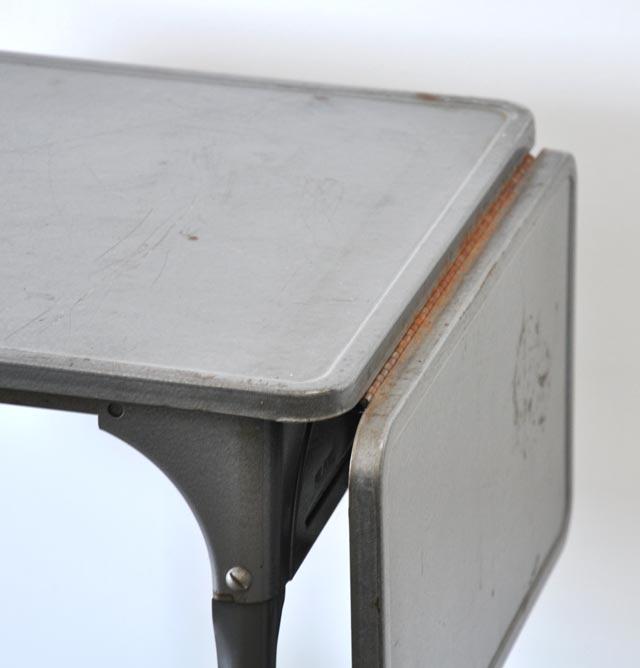
Andrew was kind enough to do the dirty work and remove the dirt and rust with WD40 and steel wool. It took a while to get into all the grooves and clean up the surface, but it’s important to take your time and prep the surface.
We cleaned off the excess WD40 with paper towel and let it dry a bit before coating the entire surface in CIL Smart 3 Primer with a foam roller and small paint brush. Primer will even out the surface and help the top coat stick to the smooth finish. The best technique is to use the small brush to get in the corners and any places the roller won’t fit, and since the foam roller has some flex to it, I went over the brush marks as best as I could to smooth out the finish.
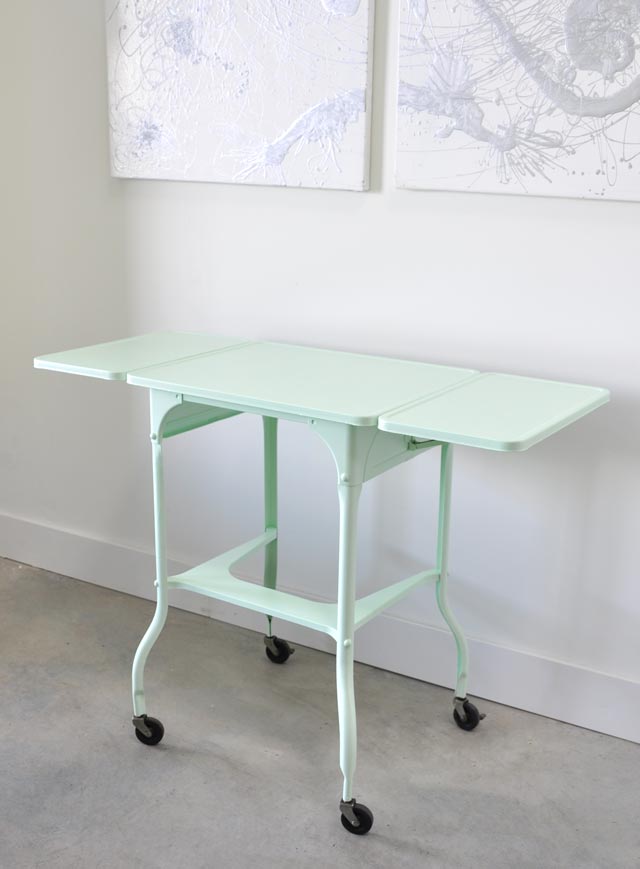
Once 2 coats of primer was applied I coated it in 2-3 coats of Benjamin Moore Advance High Gloss in Mantis Green.
The only issues I had in the end was the paint peeling off a bit where the hinges move, it’s just something I had to accept because of functionality, besides it’s not that noticeable since most of the movable parts of underneath the piece. I find it also adds to the character of the cart.


such a pretty bright update! what an amazing $5 find!
Thanks Emily!
OMGoodness! Seriously in love with this cart- the color!? Perfect!!! Your whole entire blog is glorious! I have a little mid century cabinet I need to give a makeover too and now I have gobs of inspiration! Thank you!
Amber @ Averie Lane
Thanks Amber! Glad I could inspire you, hope the makeover goes well 🙂
Lovely! Excellent choice of colour.
nicole!! you are too brilliant at this!! i love all of your furniture makeovers. and also your photos and how you style them afterward! like this little cutie! ^__^ thank you so much for your super sweet comment on my recent blog post, it meant a lot! (i left a reply, hehe!) glad we were able to meet recently in real life! 🙂
Thanks Lyndsay! Your comments are too kind. This little cart is currently at Poppytalk’s shop if you ever want to see it in real life 🙂 So nice to meet you in person too, i’m sure i’ll see you again sometime at another event where i can hopefully eat more of your cake haha!
Pingback: Vintage Typewriter Cart at Poppytalk - visualheart
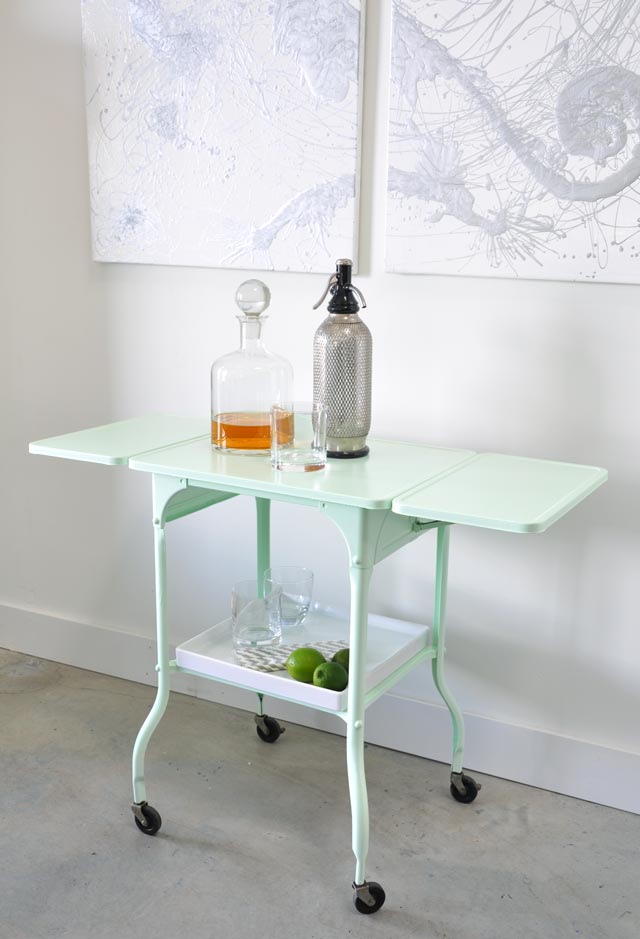
Perfect colour; looks amazing! Where did you find the tray for the shelf?
Hi Sara, the tray is actually a ceramic platter from CB2, but I’m sure you could find something like this pretty much anywhere. Thrift store perhaps.